Countly is an extensible analytics platform using plugins. This guide will describe how you can create your own plugins to extend Countly functionality.
Overview
To learn how to create plugins there are a few steps that you would need to accomplish. Start reading from this (Introduction) document and then read links below for a structured learning process.
- Get familiar with plugin structure, adding/removing plugins
- Create API part to handling REST API requests for your plugin
- Create frontend server script to handle frontend requests if needed
- Organize frontend client side browser files in correct plugins structure
- Create model to fetch and manage your data and view to display it in Countly dashboard
- Modifying existing behavior of a plugin
- Use shared documents to store your configuration
- Use Countly's centralized logger system for a better debugging and output
- Benefit from MongoDB document splitting feature to split large amounts of data
Plugin management
You can now see a plugin directory in your Countly installation. There are two files by default:
- pluginManager.js - which enables/disabled plugins and connects them with Countly
- plugins.json - file which contains json array with plugin names which are currently enabled.
So for example if you have plugins density and locale enabled, the contents of plugins.json should look like
["density", "locale"];Additionally this folder contains all the available plugins and all new plugins should be placed here, each in its own folder.
Important notice
Folder name should be the same as plugin name.
Starting your plugin development
Here are some tips and prerequisites when you start developing your plugin.
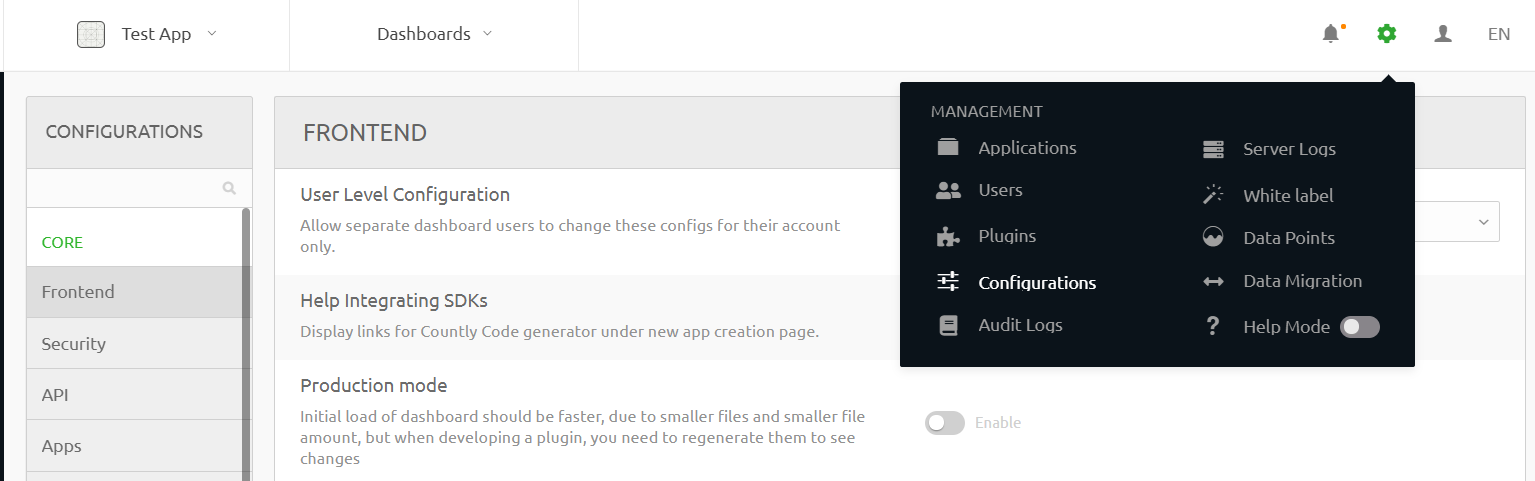
Disable production mode
By default Countly works in Production mode when lots of frontend files are minimized and concatenated to speed up dashboard loading. But when you develop plugin, in some cases you would also want to modify frontend/browser side files. And to see your changes immediately, you must disable Production mode.
To do that, go to Top Cog -> Configuration -> Frontend and click on Disable near Production mode and click Apply Changes to save the changes.
or you can use command line to disable production mode:
countly config "frontend.production" false
Updating localization files
Localization files are processed separately combined all in one single file, so if you modify localization files in your plugin, you need to run countly task locales before these changes would be displayed in the dashboard.
Updating server side files
Since nodejs runs a process with preloaded files, every time you update server side files, you will need to restart this process for changes to take an effect, to do that, simply run countly restart on your server
Using plugin template to start
There is also plugin template available in the plugins folder by the name empty.
And the best way to start developing your plugin, by copying directory empty and renaming it to your plugin.
After that you can change plugin meta data in the plugin's package.json file, add dependencies etc.
You can delete yourplugin/frontend/public/localization/empty.properties file and create your own localization file using your plugin name as file name
And all is left is to add contents to provided standard plugin files on both api server, frontend server and frontend browser sides.